How to Replace a Sump Pump
How to replace a sump pump step by step — choosing a matched replacement, disconnecting the old one safely, setting the new pump, and testing before you rely on it.
Sump Pumps & Interior Drainage
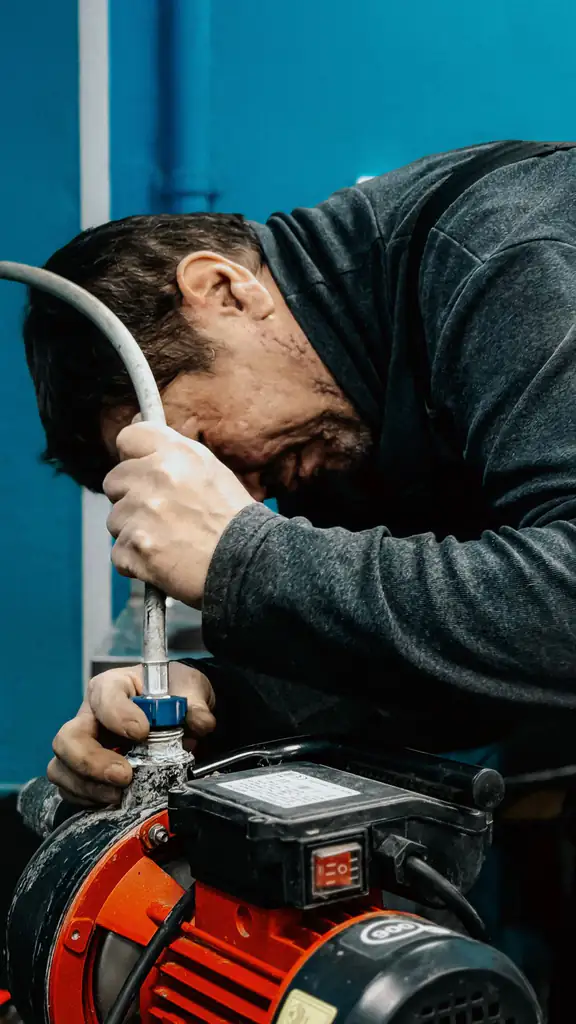
Installing a sump pump means setting the pump in a proper pit, wiring it to a dedicated GFCI circuit, fitting a check valve and a discharge line that carries water well away, and testing it. The pit, the electrical, and the discharge are where DIY installs go wrong, and hardwiring is a licensed-electrician job.
Installing a sump pump comes down to five things done in order: set the pump in a proper pit, connect it to a dedicated GFCI-protected circuit, fit a check valve, run a discharge line that carries water well away from the house, and test the whole system before you trust it. The mechanical steps are within reach for many homeowners. The pit, the electrical, and the discharge line are where installs most often go wrong — and any new wiring or hardwiring is a licensed electrician’s job, not a weekend experiment.
This guide walks through the sequence and flags the parts worth handing to a professional. If you want to understand what the pump is actually doing once it’s in, how a sump pump works covers the mechanics.
A sump pump is an electrical device that sits in water. The outlet must be GFCI protected, and adding a dedicated circuit, installing a new outlet, or any hardwiring is work for a licensed electrician. Do not improvise wiring, and never work on the pump with the power on. When in doubt about the electrical side, stop and call a pro.
The three things that make or break an install are decided before you ever lower the pump.
The pit has to be the right size for the pump, with clearance for the float to rise and fall freely. If you are cutting a new pit into a concrete slab, that is heavy, dusty work with real consequences for the foundation, and many homeowners bring in help for it. The sump pit and basin basics guide covers how the pit is built and lined.
The power should be a dedicated, GFCI-protected circuit so the pump isn’t sharing a breaker with loads that could knock it offline during a storm. Adding that circuit is electrical work for a licensed electrician.
The discharge route needs to be planned before installation, not improvised after. Know where the water is going and how the line will get there before you set the pump.
Here is the typical sequence for a submersible install into an existing or freshly prepared pit.
| Step | What you do | Watch out for |
|---|---|---|
| 1. Prepare the pit | Clean it out; confirm size and float clearance | A pit too small makes the pump short-cycle |
| 2. Set the pump | Place it level on the pit floor, off any silt | A tilted pump can bind the float |
| 3. Fit the check valve | Install on the vertical discharge pipe, arrow pointing up/away | Backwards valve blocks all flow |
| 4. Run the discharge line | Connect pipe and route it toward the exit point | Sags and low spots trap water and freeze |
| 5. Connect power | Plug into the GFCI outlet on its dedicated circuit | New wiring is an electrician’s job |
| 6. Test | Pour water in, watch it cycle and discharge | Skipping this hides install faults |
Place the pump flat on the bottom of the pit so it sits level and stable. A pump resting on silt or debris can suck grit into the impeller, and a tilted pump can let its float hang up against the wall. Confirm the float can travel its full range without catching the basin, the discharge pipe, or its own cord. That single check prevents a surprising number of “the new pump won’t stop” and “the new pump won’t start” calls.
The check valve goes on the vertical run of the discharge pipe. It is a one-way valve, so orientation matters — most have an arrow molded into the body showing flow direction. Installed backwards, it blocks the pump entirely. Installed correctly, it holds the water that’s already in the pipe from falling back into the pit each time the pump stops, which keeps the pump from re-pumping the same water. Our check valve guide explains why this small part matters so much.
Connect the discharge pipe to the check valve and route it out of the pit and toward its exit. Keep the run as free of sags and low spots as you can — trapped water in a dip can freeze and block the line in winter. Where the water finally goes is a decision in its own right, covered next.
The single most common install mistake is dumping the discharge too close to the house. If the water lands a foot from the foundation, it soaks back into the ground, flows toward the pit, and the pump ends up moving the same water in a loop. The line needs to carry water far enough that the ground slopes away from it and the water keeps going.
There are also rules about where you may not send it — many areas prohibit routing sump discharge into the sanitary sewer, for instance. Where does a sump pump discharge walks through the acceptable options and the local-code cautions.
A sump pump is the last line of defense, not the first. It manages water that has already reached the pit. Grading, gutters, and downspout extensions that keep water away from the foundation do more to protect a basement than any pump — the pump complements exterior drainage rather than replacing it.
Once everything is connected and the power is on, fill the pit slowly with water — a bucket works — until the float rises and trips the pump. Watch the whole cycle: the pump should start, pump the pit down, and shut off cleanly without hunting or restarting immediately. Step outside and confirm water is actually leaving the discharge line where you intended. Back at the pit, make sure water isn’t falling back in when the pump stops, which would point to a check valve problem.
Doing this on a calm day, rather than discovering a fault mid-storm, is the entire reason to test. From here, our maintenance and testing guide covers keeping it reliable over the years.
Get the pit, the power, and the discharge right, fit the check valve the correct way around, and test before you rely on it. Those are the parts that separate an install you can forget about from one that fails when you need it most — and the electrical work, in particular, is worth handing to a licensed pro.
FAQ
Many homeowners handle the mechanical parts — setting the pump in the pit, fitting the check valve, and running the discharge line. The electrical side is different. Plugging a pump into an existing GFCI outlet is one thing, but adding a dedicated circuit, installing a new outlet, or any hardwiring is a licensed electrician's job. If your plan involves new wiring, cutting a pit into a slab, or altering plumbing, bringing in a pro for those steps is the safer path.
A dedicated circuit is strongly preferred. It keeps the pump from sharing a breaker with other loads that could trip it offline right when a storm is loading the pump hardest. The outlet should be GFCI protected because the pump is an electrical device sitting in water. Adding a dedicated circuit is electrical work that a licensed electrician should do, both for safety and to meet local code.
The pit needs to be deep and wide enough for the specific pump, with room for the float to travel its full range without catching the walls. A too-small pit makes the pump short-cycle, and a too-shallow one can let water reach the floor before the pump triggers. Follow the pump maker's stated pit dimensions rather than guessing, and see our sump pit and basin basics guide for how the pit itself is built.
Well away from the foundation — far enough that the water does not simply run back toward the house and into the pit again. That usually means extending the line several feet from the wall to a spot where the ground slopes away, and never into a sanitary sewer where that is prohibited. Discharge placement is one of the most common install mistakes; our discharge guide covers the options and pitfalls.
Yes, in nearly all cases. The check valve is a one-way valve on the discharge line that stops the column of water in the pipe from draining back into the pit when the pump shuts off. Without it, the pump re-pumps the same water repeatedly and cycles far more than it should. It is a small part that makes a large difference to how the finished install behaves.
Pour water into the pit slowly until the float rises and trips the pump on, then watch it pump the pit down and shut off cleanly. Check that water actually leaves the discharge line outside, that no water falls back into the pit, and that the float has clear travel. Doing this before you rely on the pump — rather than during the first storm — is the point of testing.
Keep reading
How to replace a sump pump step by step — choosing a matched replacement, disconnecting the old one safely, setting the new pump, and testing before you rely on it.
How a sump pump works in a crawl space — when you need one, how it pairs with a vapor barrier, access and maintenance challenges, and what it does and doesn't fix.
Why sump pump float switches fail — stuck floats, tangled tethers, crooked pumps, and worn switches — plus how to diagnose each and what to check first.